ablog

不器用で落着きのない技術者のメモ

Lambda in VPC から VPC Endpoint 経由で CloudWatch Logs の API を実行する

Lambda in VPC から VPC Endpoint (Private Link) 経由で CloudWatch Logs の API を実行してみた。クロスアカウントで Lambda から CloudWatch Logs にアクセスする - ablog と同じものを in VPC でやってみた。ポイントは以下の通り。

  • STS と CloudWatch Logs の VPC Endpoint (PrivateLink) を作成する。
    • CloudWatch Logs: com.amazonaws.ap-northeast-1.logs
    • STS: com.amazonaws.ap-northeast-1.sts
  • Lambda in VPC 実行用のIAMロールに以下のIAMポリシーをアタッチしたIAMロールを作成する。
    • AWSLambdaVPCAccessExecutionRole(AWS管理)
    • STSAssumeRole(ユーザー管理)
{
    "Version": "2012-10-17",
    "Statement": [
        {
            "Sid": "STSAssumeRole",
            "Effect": "Allow",
            "Action": "sts:AssumeRole",
            "Resource": "*"
        }
    ]
}
  • Lambda 作成時に [ネットワーク] で VPC、Subnet、Security Group を作成する。
  • Lambda のコードで、STS のクライアントオブジェクト生成時に region_name と endpoint_url に実行するリージョン名とエンドポイントを指定する。
import boto3

def lambda_handler(context, event):

    print('connect to sts')
    sts_connection = boto3.client('sts', region_name='ap-northeast-1', endpoint_url='https://sts.ap-northeast-1.amazonaws.com') # ★ region_name と endpoint_url を指定する
    acct_b = sts_connection.assume_role(
        RoleArn="arn:aws:iam:: 123456789012:role/CWLforOtherAccountLambda",
        RoleSessionName="cross_acct_lambda"
    )
    print('connected to sts')    
    ACCESS_KEY = acct_b['Credentials']['AccessKeyId']
    SECRET_KEY = acct_b['Credentials']['SecretAccessKey']
    SESSION_TOKEN = acct_b['Credentials']['SessionToken']

    client = boto3.client(
        'logs',
        aws_access_key_id=ACCESS_KEY,
        aws_secret_access_key=SECRET_KEY,
        aws_session_token=SESSION_TOKEN,
    )

    response = client.get_log_events(
        logGroupName='/aws-glue/crawlers',
        logStreamName='workshop-sh10json'
    )

    return response

参考

実行ロールおよびユーザーアクセス許可
Lambda は、関数のアクセス許可を使用してネットワークインターフェイスを作成および管理します。VPC に接続するには、関数の実行ロールに次のアクセス許可がある必要があります。
実行ロールのアクセス権限

  • ec2:CreateNetworkInterface
  • ec2:DescribeNetworkInterfaces
  • ec2:DeleteNetworkInterface

これらのアクセス許可は、AWSLambdaVPCAccessExecutionRole 管理ポリシーに含まれています。

https://docs.aws.amazon.com/ja_jp/lambda/latest/dg/configuration-vpc.html

クロスアカウントで Lambda から CloudWatch Logs にアクセスする

アカウントA(123456789012)の Lambda からアカウントB(234567890123)の CloudWatch Logs の API を実行してみた。

実行結果

  • 戻り値
{
  "events": [
    {
      "timestamp": 1543366128635,
      "message": "[940dea18-b6de-4851-a4b1-34cd0ed38541] BENCHMARK : Running Start Crawl for Crawler workshop-sh10json",
      "ingestionTime": 1543366139237
    },
    {
      "timestamp": 1543366169930,
      "message": "[940dea18-b6de-4851-a4b1-34cd0ed38541] BENCHMARK : Classification complete, writing results to database default",
      "ingestionTime": 1543366196029
    },
  • ログ出力
START RequestId: 07ea4b0c-3a29-4649-b21d-40ce9412a70c Version: $LATEST
END RequestId: 07ea4b0c-3a29-4649-b21d-40ce9412a70c
REPORT RequestId: 07ea4b0c-3a29-4649-b21d-40ce9412a70c	Duration: 1998.25 ms	Billed Duration: 2000 ms	Memory Size: 128 MB	Max Memory Used: 78 MB	Init Duration: 257.63 ms	

アカウントA

arn:aws:iam::123456789012:role/LambdaRoleForCrossAccount
  • Permissions policies
    • AWSLambdaExecute(AWS managed)
    • AssumeRolePolicy(Customer managed)
{
    "Version": "2012-10-17",
    "Statement": [
        {
            "Sid": "Assume Role Policy",
            "Effect": "Allow",
            "Action": "sts:AssumeRole",
            "Resource": "*"
        }
    ]
}
arn:aws:lambda:ap-northeast-1:123456789012:function:CWLFunction
  • Runtime: Pyhon 3.7
  • Execution role: LambdaRoleForCrossAccount
import boto3

def lambda_handler(context, event):

    sts_connection = boto3.client('sts')
    acct_b = sts_connection.assume_role(
        RoleArn="arn:aws:iam::234567890123:role/CWLRoleForCrossAccount",
        RoleSessionName="cross_acct_lambda"
    )
    
    ACCESS_KEY = acct_b['Credentials']['AccessKeyId']
    SECRET_KEY = acct_b['Credentials']['SecretAccessKey']
    SESSION_TOKEN = acct_b['Credentials']['SessionToken']

    client = boto3.client(
        'logs',
        aws_access_key_id=ACCESS_KEY,
        aws_secret_access_key=SECRET_KEY,
        aws_session_token=SESSION_TOKEN,
    )

    response = client.get_log_events(
        logGroupName='/aws-glue/crawlers',
        logStreamName='workshop-sh10json'
    )

    return response

アカウントB

arn:aws:iam::234567890123:role/CWLRoleForCrossAccount
  • Permissions policies
    • CloudWatchLogsReadOnlyAccess(AWS managed)
  • Trust relationships
{
  "Version": "2012-10-17",
  "Statement": [
    {
      "Effect": "Allow",
      "Principal": {
        "AWS": "arn:aws:iam::123456789012:role/LambdaRoleForCrossAccount"
      },
      "Action": "sts:AssumeRole",
      "Condition": {}
    }
  ]
}

VPC エンドポイント以外からの読み書きを禁止するS3バケットポリシー

シンプルに VPC エンドポイント以外からの読み書きを禁止するS3バケットポリシー。

{
    "Version": "2012-10-17",
    "Statement": [
        {
            "Sid": "Access-to-specific-VPCE-only",
            "Effect": "Deny",
            "Principal": "*",
            "Action": [
                "s3:PutObject",
                "s3:GetObject",
                "s3:DeleteObject"
            ],
            "Resource": [
                "arn:aws:s3:::test-bucket-20200129",
                "arn:aws:s3:::test-bucket-20200129/*"
            ],
            "Condition": {
                "StringNotEquals": {
                    "aws:sourceVpce": "vpce-0a******fa"
                }
            }
        }
    ]
}

ECS と EKS

コントロールプレーンとデータプレーン
  • ECS と EKS はコントロールプレーン。
  • データプレーンは EC2 タイプと Fargate タイプがある。


EKSを触ってみる

EKS を触ってみる

  • EC2インスタンスを作成して、ssh でログインする。
  • IAMロールを作成してEC2にアタッチする。
  • eksctl をインストールする。
$ curl --silent --location "https://github.com/weaveworks/eksctl/releases/download/latest_release/eksctl_$(uname -s)_amd64.tar.gz" | tar xz -C /tmp
$ sudo mv /tmp/eksctl /usr/local/bin
$ eksctl version
[]  version.Info{BuiltAt:"", GitCommit:"", GitTag:"0.13.0"}
  • kubectl をインストールする。
$ curl -o kubectl https://amazon-eks.s3-us-west-2.amazonaws.com/1.12.7/2019-03-27/bin/linux/amd64/kubectl
$ chmod +x ./kubectl
$ mkdir -p $HOME/bin && cp ./kubectl $HOME/bin/kubectl && export PATH=$HOME/bin:$PATH
$ echo 'export PATH=$HOME/bin:$PATH' >> ~/.bashrc
$ kubectl version --short --client
Client Version: v1.12.7
  • aws-iam-authenticator をインストールする。
$ curl -o aws-iam-authenticator https://amazon-eks.s3-us-west-2.amazonaws.com/1.12.7/2019-03-27/bin/linux/amd64/aws-iam-authenticator
$ chmod +x ./aws-iam-authenticator
$ mkdir -p $HOME/bin && cp ./aws-iam-authenticator $HOME/bin/aws-iam-authenticator && export PATH=$HOME/bin:$PATH
$ echo 'export PATH=$HOME/bin:$PATH' >> ~/.bashrc
$ aws-iam-authenticator help
A tool to authenticate to Kubernetes using AWS IAM credentials

Usage:
  aws-iam-authenticator [command]

Available Commands:
  help        Help about any command
  init        Pre-generate certificate, private key, and kubeconfig files for the server.
  server      Run a webhook validation server suitable that validates tokens using AWS IAM
  token       Authenticate using AWS IAM and get token for Kubernetes
  verify      Verify a token for debugging purpose
  version     Version will output the current build information

Flags:
  -i, --cluster-id ID       Specify the cluster ID, a unique-per-cluster identifier for your aws-iam-authenticator installation.
  -c, --config filename     Load configuration from filename
  -h, --help                help for aws-iam-authenticator
  -l, --log-format string   Specify log format to use when logging to stderr [text or json] (default "text")

Use "aws-iam-authenticator [command] --help" for more information about a command.
  • AWS CLI のデフォルトリージョンを設定する。
$ aws configure
AWS Access Key ID [None]: 
AWS Secret Access Key [None]: 
Default region name [ap-northeast-1]: ap-northeast-1
Default output format [None]: 
$ eksctl create cluster \
--name EKS-handson \
--version 1.14 \
--nodegroup-name standard-workers \
--node-type t2.micro \
--nodes 3 \
--nodes-min 3 \
--nodes-max 5 \
--node-ami auto
$ kubectl get all

NAME                 TYPE        CLUSTER-IP   EXTERNAL-IP   PORT(S)   AGE
service/kubernetes   ClusterIP   10.100.0.1   <none>        443/TCP   15m
  • サンプルアプリケーションを入手する。
$ sudo yum -y install git
$ git clone https://github.com/kubernetes/examples.git
  • examples/guestbook/frontend-service.yaml を編集する。
apiVersion: v1
kind: Service
metadata:
  name: frontend
  labels:
    app: guestbook
    tier: frontend
spec:
  # comment or delete the following line if you want to use a LoadBalancer
  #  type: NodePort ★コメントアウト
  # if your cluster supports it, uncomment the following to automatically create
  # an external load-balanced IP for the frontend service.
  type: LoadBalancer ★コメントアウトを外す
  ports:
  - port: 80
  selector:
    app: guestbook
    tier: frontend
  • アプリケーションをデプロイする。
$ kubectl apply -f examples/guestbook
$ kubectl get pod
  • pod の状態を確認する。
$ kubectl get pod
NAME                           READY   STATUS    RESTARTS   AGE
frontend-69859f6796-957fl      1/1     Running   0          5m39s
frontend-69859f6796-9k487      1/1     Running   0          5m39s
frontend-69859f6796-dwphj      1/1     Running   0          5m39s
redis-master-596696dd4-l9w8n   1/1     Running   0          5m39s
redis-slave-96685cfdb-6ppw9    0/1     Pending   0          5m38s
redis-slave-96685cfdb-dkfg6    0/1     Pending   0          5m38s
  • サービスの状態を確認する。
$ kubectl get service
NAME           TYPE           CLUSTER-IP      EXTERNAL-IP                                                                   PORT(S)        AGE
frontend       LoadBalancer   10.100.26.209   a******-1******6.ap-northeast-1.elb.amazonaws.com   80:32040/TCP   8m22s
kubernetes     ClusterIP      10.100.0.1      <none>                                                                        443/TCP        27m
redis-master   ClusterIP      10.100.79.54    <none>                                                                        6379/TCP       8m22s
redis-slave    ClusterIP      10.100.195.10   <none>                                                                        6379/TCP       8m21s
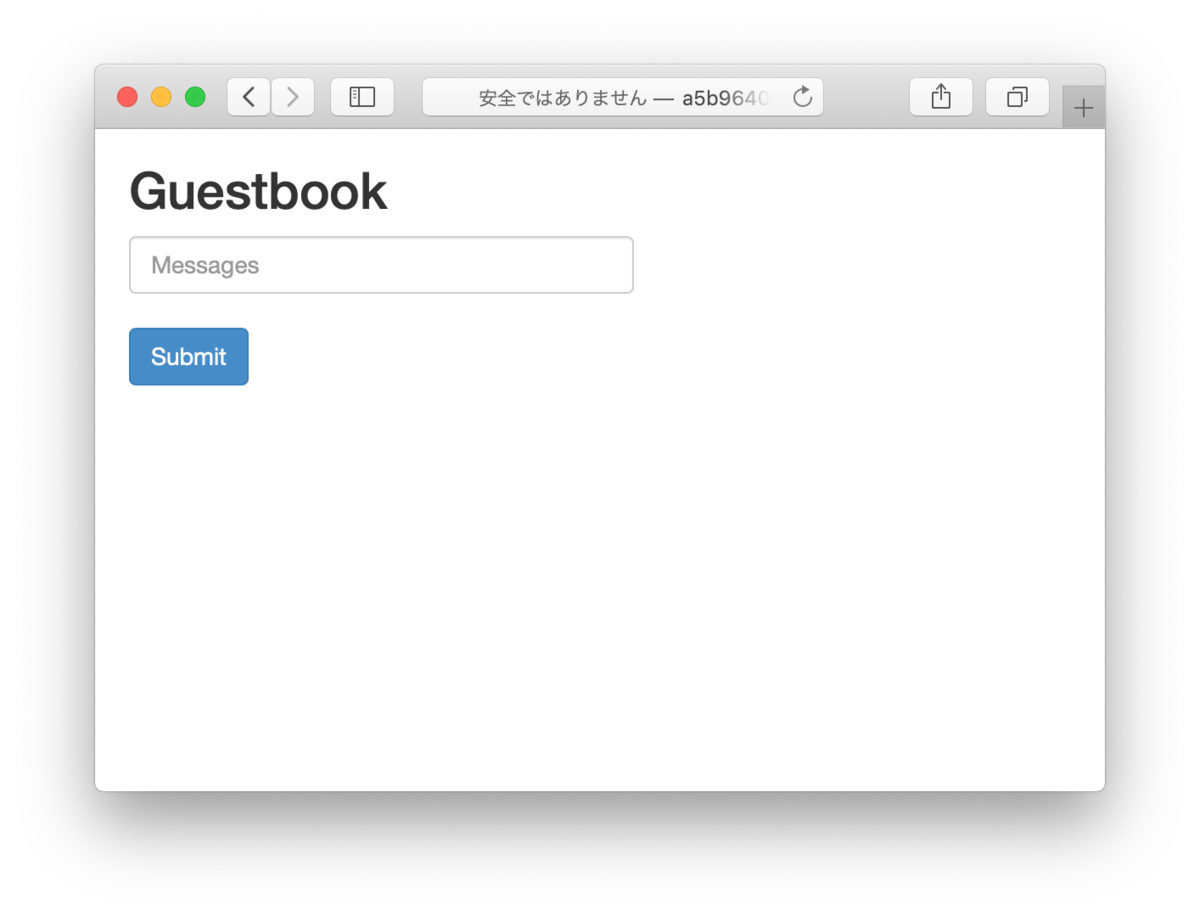
  • 上記の "frontend" の URL にブラウザでアクセスする。

f:id:yohei-a:20200123122837p:plain

Fargate for EKS を触ってみる

  • eks-fargate-pods-policy.json を作成する。
{
  "Version": "2012-10-17",
  "Statement": {
    "Effect": "Allow",
    "Principal": {
      "Service": "eks-fargate-pods.amazonaws.com"
    },
    "Action": "sts:AssumeRole"
  }
}
  • IAMロールを作成する。
$ aws iam create-role \
    --role-name AmazonEKSFargatePodExecutionRole \
    --assume-role-policy-document file://eks-fargate-pods-policy.json
  • IAMロールにIAMポリシーをアタッチする。
$ aws iam attach-role-policy \
    --role-name AmazonEKSFargatePodExecutionRole\
    --policy-arn "arn:aws:iam::aws:policy/AmazonEKSFargatePodExecutionRolePolicy"
  • マネジメントコンソールでEKSクラスターを表示し、「Faragateプロファイルを追加」をクリックし、ウイザードに従って追加する。
    • name: test-profile
    • Pod execution role: AmazonEKSFargatePodExecutionRole
    • サブネット: パブリックサブネットは「×」を押して選択から外す。
    • Namespace: default
  • Pod が実行状態になっていることを確認する。
$ kubectl get pods
NAME                           READY   STATUS    RESTARTS   AGE
demo-app-6dbfc49497-kzptt      1/1     Running   0          7m53s ★
frontend-69859f6796-957fl      1/1     Running   0          31m
frontend-69859f6796-9k487      1/1     Running   0          31m
frontend-69859f6796-dwphj      1/1     Running   0          31m
redis-master-596696dd4-l9w8n   1/1     Running   0          31m
redis-slave-96685cfdb-6ppw9    0/1     Pending   0          31m
redis-slave-96685cfdb-dkfg6    0/1     Pending   0          31m
  • ノードを確認すると fargate が追加されている。
$ kubectl get nodes
NAME                                                         STATUS   ROLES    AGE     VERSION
fargate-ip-192-168-170-190.ap-northeast-1.compute.internal   Ready    <none>   7m13s   v1.14.8-eks ★
ip-192-168-5-125.ap-northeast-1.compute.internal             Ready    <none>   44m     v1.14.8-eks-b8860f
ip-192-168-52-17.ap-northeast-1.compute.internal             Ready    <none>   44m     v1.14.8-eks-b8860f
ip-192-168-93-205.ap-northeast-1.compute.internal            Ready    <none>   44m     v1.14.8-eks-b8860f

PySpark on Glue で S3 上のファイル名をリネームする

PySpark on Glue で S3 上のファイルをリネームしてみた。

import sys
from awsglue.transforms import *
from awsglue.utils import getResolvedOptions
from pyspark.context import SparkContext
from awsglue.context import GlueContext
from awsglue.job import Job

glueContext = GlueContext(SparkContext.getOrCreate())

URI = SparkContext._gateway.jvm.java.net.URI
Path = SparkContext._gateway.jvm.org.apache.hadoop.fs.Path
FileSystem = SparkContext._gateway.jvm.org.apache.hadoop.fs.s3.S3FileSystem

fs = FileSystem.get(URI("s3://{}".format('raw_log_bucket')), glueContext._jsc.hadoopConfiguration())

fs.rename(
    Path("s3://raw_log_bucket/log_20200122"),
    Path("s3://raw_log_bucket/log_20200122_renamed")
)
  • パスを取得して変更する例、ファイルが複数あるケースには対応していない。
import boto3
df_sql_result.coalesce(1).write.mode('overwrite').csv("s3://s3-bucket-name/output/", header=True)
URI = SparkContext._gateway.jvm.java.net.URI
Path = SparkContext._gateway.jvm.org.apache.hadoop.fs.Path
FileSystem = SparkContext._gateway.jvm.org.apache.hadoop.fs.s3.S3FileSystem

fs = FileSystem.get(URI("s3://{}".format('s3-bucket-name')), glueContext._jsc.hadoopConfiguration())

s3_resource = boto3.resource('s3')
s3_object_list = s3_resource.Bucket('s3-bucket-name').objects.filter(Prefix='output/')
s3_object_names = [item.key for item in s3_object_list]
fs.rename(
    Path("s3://s3-bucket-name/" + s3_object_names[0]),
    Path("s3://s3-bucket-name/output/output_01.csv")
)

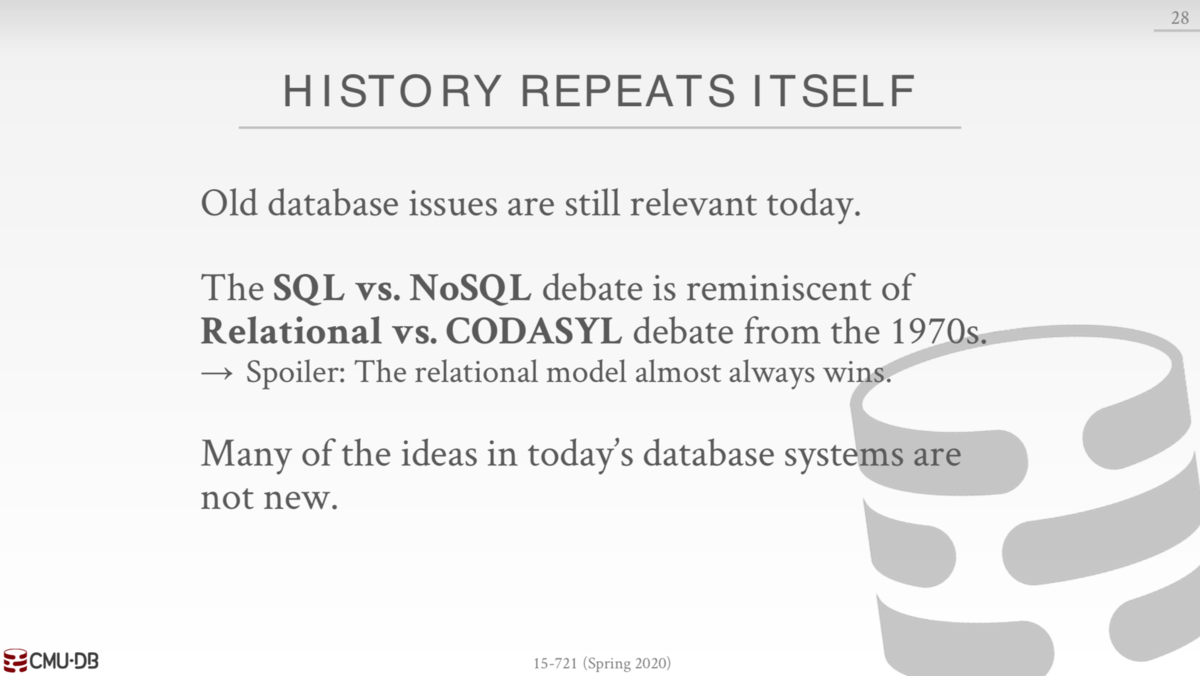
CMU の Andy Palvo 先生の History of Database が素晴らしい

カーネギーメロン大学コンピュータサイエンス学科でデータベースの研究をされている Andy Pavlo 先生の "History of Database" が素晴らしい。Andy Pavlo 先生を知ったのは一昨年くらいに id:kumagi さんと飲んだときに教えてもらったのがきっかけで、その後ウォッチしている。


  • NoSQL vs SQL は1960年代からあったよという、ですよねという話

  • RDBに関わってた三人、System R に関わってた Jim Gray と、Ingress に関わってた Michel Stonebreaker はチューリング賞を受賞し、Oracle のLarry Ellison は世界的な富豪になっている。DB って面白いよねと。