ablog

不器用で落着きのない技術者のメモ

AWS Glue で Amazon DynamoDB に読み書きする

AWS Glue の Spark ジョブで Amazon DynamoDB のテーブルから別のテーブルにデータをコピーしてみた。

手順

DynamoDB のテーブルを作成する
  • src_table
    • プライマリキー: key
    • 3件ほどItemを追加する
  • dst_table
    • プライマリキー: key
    • テーブルは空のままにしておく
Glue Spark ジョブを作成する
  • Glue Spark ジョブを作成、以下以外はデフォルト。
    • ジョブ名: ddb2ddb_job
    • Type: Spark
    • Spark 2.4, Python 3 (Glue Version 2.0)
import sys
from pyspark.context import SparkContext
from awsglue.context import GlueContext
from awsglue.job import Job
from awsglue.utils import getResolvedOptions

args = getResolvedOptions(sys.argv, ["JOB_NAME"])
glue_context= GlueContext(SparkContext.getOrCreate())
job = Job(glue_context)
job.init(args["JOB_NAME"], args)

dyf = glue_context.create_dynamic_frame.from_options(
    connection_type="dynamodb",
    connection_options={
        "dynamodb.input.tableName": "src_table",
        "dynamodb.throughput.read.percent": "1.0",
        "dynamodb.splits": "100"
    }
)

print(dyf.getNumPartitions())

glue_context.write_dynamic_frame_from_options(
    frame=dyf,
    connection_type="dynamodb",
    connection_options={
        "dynamodb.output.tableName": "dst_table",
        "dynamodb.throughput.write.percent": "1.0"
    }
)

job.commit()

結果

Glue ジョブを実行すると、src_table のデータを dst_table にコピーできた。

  • コピー元テーブル

  • コピー先テーブル

S3 にある CSV を DynamoDB にインポートする Python スクリプト

ソースコード

#!/usr/bin/env bash

export bucket=aws-s3-bucket
export key=test/test_table.csv
export table=testTable

python ./ddb_csv_importer.py
#!/usr/bin/env python3
# -*- coding: utf-8 -*-

import boto3
import os
import csv
import codecs

s3 = boto3.resource('s3')
dynamodb = boto3.resource('dynamodb')

bucket = os.environ['bucket']
key = os.environ['key']
tableName = os.environ['table']

 
def write_to_dynamo(rows):
   try:
      table = dynamodb.Table(tableName)
   except:
      print("Error loading DynamoDB table. Check if table was created correctly and environment variable.")

   try:
      with table.batch_writer() as batch:
         for i in range(len(rows)):
            casted_row = dict(map(lambda cols: map(str, cols), rows[i].items()))
            batch.put_item(
               Item=casted_row
            )

   except:
      print("Error executing batch_writer")
      import traceback
      traceback.print_exc()

if __name__ == '__main__':
   #get() does not store in memory
   try:
       obj = s3.Object(bucket, key).get()['Body']
   except:
       print("S3 Object could not be opened. Check environment variable. ")
   try:
       table = dynamodb.Table(tableName)
   except:
       print("Error loading DynamoDB table. Check if table was created correctly and environment variable.")

   batch_size = 100
   batch = []

   #DictReader is a generator; not stored in memory
   for row in csv.DictReader(codecs.getreader('utf-8')(obj)):
      if len(batch) >= batch_size:
         write_to_dynamo(batch)
         batch.clear()

      batch.append(row)

   if batch:
      write_to_dynamo(batch)

前提

  • DynamoDB にテーブルを作成しておく。

実行する

$ ./ddb_csv_importer.sh 

DynamoDB に BatchWriteItem で書こうとすると "when calling the BatchWriteItem operation: The provided key element does not match the schema" と怒られる。

事象

DynamoDB に BatchWriteItem で書こうとすると "when calling the BatchWriteItem operation: The provided key element does not match the schema" と怒られる。

Error executing batch_writer
Traceback (most recent call last):
  File "./ddb_csv_importer.py", line 35, in write_to_dynamo
    exit
  File "/home/ec2-user/.pyenv/versions/3.6.9/lib/python3.6/site-packages/boto3/dynamodb/table.py", line 156, in __exit__
    self._flush()
  File "/home/ec2-user/.pyenv/versions/3.6.9/lib/python3.6/site-packages/boto3/dynamodb/table.py", line 137, in _flush
    RequestItems={self._table_name: items_to_send})
  File "/home/ec2-user/.pyenv/versions/3.6.9/lib/python3.6/site-packages/botocore/client.py", line 316, in _api_call
    return self._make_api_call(operation_name, kwargs)
  File "/home/ec2-user/.pyenv/versions/3.6.9/lib/python3.6/site-packages/botocore/client.py", line 635, in _make_api_call
    raise error_class(parsed_response, operation_name)
botocore.exceptions.ClientError: An error occurred (ValidationException) when calling the BatchWriteItem operation: The provided key element does not match the schema

対策

型を DynamoDB のテーブル定義の String に変換すると解消した。

  • 修正前
            batch.put_item(
               Item={
                  "col1" : i,
                  "col2" : i
               }
            )
  • 修正後
            batch.put_item(
               Item={
                  "col1" : str(i),
                  "col2" : str(i)
               }
            )

補足

  • 周辺のコード
def write_to_dynamo(rows):
   try:
      table = dynamodb.Table(tableName)
   except:
      print("Error loading DynamoDB table. Check if table was created correctly and environment variable.")

   try:
      with table.batch_writer() as batch:
         for i in range(len(rows)):
            od = rows[i]
            l = list(od.items())
            batch.put_item(
               Item={
                  "col1" : str(i),
                  "col2" : str(i)
               }
            )
  • テーブル定義
$ aws dynamodb describe-table --table-name testTable
{
    "Table": {
        "AttributeDefinitions": [
            {
                "AttributeName": "col1",
                "AttributeType": "S"
            },
            {
                "AttributeName": "col2",
                "AttributeType": "S"
            }
        ],
        "TableName": "testTable",
        "KeySchema": [
            {
                "AttributeName": "col1",
                "KeyType": "HASH"
            },
            {
                "AttributeName": "col2",
                "KeyType": "RANGE"
            }
        ],
        "TableStatus": "ACTIVE",
        "CreationDateTime": 1608254891.316,
        "ProvisionedThroughput": {
            "NumberOfDecreasesToday": 0,
            "ReadCapacityUnits": 5,
            "WriteCapacityUnits": 5
        },
        "TableSizeBytes": 0,
        "ItemCount": 0,
        "TableArn": "arn:aws:dynamodb:ap-northeast-1:123456789012:table/testTable",
        "TableId": "40c2****-****-****-****-********39cd"
    }
}

Session Manager plugin で Private Subnet の EC2 に踏み台なしで接続する

Session Manager plugin で Private Subnet の EC2 に踏み台なしで接続する。環境は macOS

前提

  • IAM ポリシー"AmazonSSMManagedInstanceCore"を付与した IAM ロールが EC2 にアタッチされていること。
  • 以下の VPC エンドポイントが作成されていること。
    • com.amazonaws.region.ssm
    • com.amazonaws.region.ec2messages
    • com.amazonaws.region.ssmmessages
  • VPC エンドポイントのにアタッチするセキュリティグループはEC2にアタッチしているセキュリティグループからインバウンド https が許可されていること。
  • EC2のセキュリティグループはアウトバウンドで https が許可されていること。

インストール・設定

  • macOS に Session Manager plugin をインストール
$ curl "https://s3.amazonaws.com/session-manager-downloads/plugin/latest/mac/sessionmanager-bundle.zip" -o "sessionmanager-bundle.zip"
$ unzip sessionmanager-bundle.zip
$ sudo ./sessionmanager-bundle/install -i /usr/local/sessionmanagerplugin -b /usr/local/bin/session-manager-plugin
  • ~/.ssh/config に以下を追記。
# SSH over Session Manager
host i-* mi-*
        ProxyCommand sh -c "aws ssm start-session --target %h --document-name AWS-StartSSHSession --parameters 'portNumber=%p'"

接続する

  • EC2 にセッションマネージャーで接続する。
$ ssh ec2-user@i-049***********b89 -i ~/.ssh/mykey.pem

補足

接続先の EC2 のリストをサクッと確認できるようにする。

  • aws-cli-aux tools を git clone。
$ git clone https://github.com/yoheia/aws-cli-aux.git
$ chmod u+x aws-cli-aux/bin/*
  • ~/.bash_profile に以下を追記。
export PATH=$PATH:~/Documents/src/github/aws-cli-aux/bin
  • ~/.bash_profile をロード。
$ source ~/.bash_profile
  • EC2 を一覧表示する。
$ ec2ls                                                   
------------------------------------------------------------------------------
|                              DescribeInstances                             |
+---------------+-----------------------+-------+----------------+-----------+
|   GlobalIP    |      InstanceId       | Name  |   PrivateIp    |   State   |
+---------------+-----------------------+-------+----------------+-----------+
|  13.***.***.60|  i-i-049***********b89  |  None |  172.**.**.228 |  running  |
+---------------+-----------------------+-------+----------------+-----------+
  • EC2 にセッションマネージャーで接続する。
$ ssh ec2-user@i-049***********b89 -i ~/.ssh/mykey.pem

AWS Labs の aws-shell を使ってみる

インストール

$ pip install aws-shell

使ってみる

$ aws-shell
aws>

f:id:yohei-a:20210106141448p:plain

GitHub で Web サイトを公開する

  • ブラウザで GitHub にログインする。
  • "GitHubアカウント名.github.io(例: yoheia.github.io)" という名前のリポジトリを作成する。
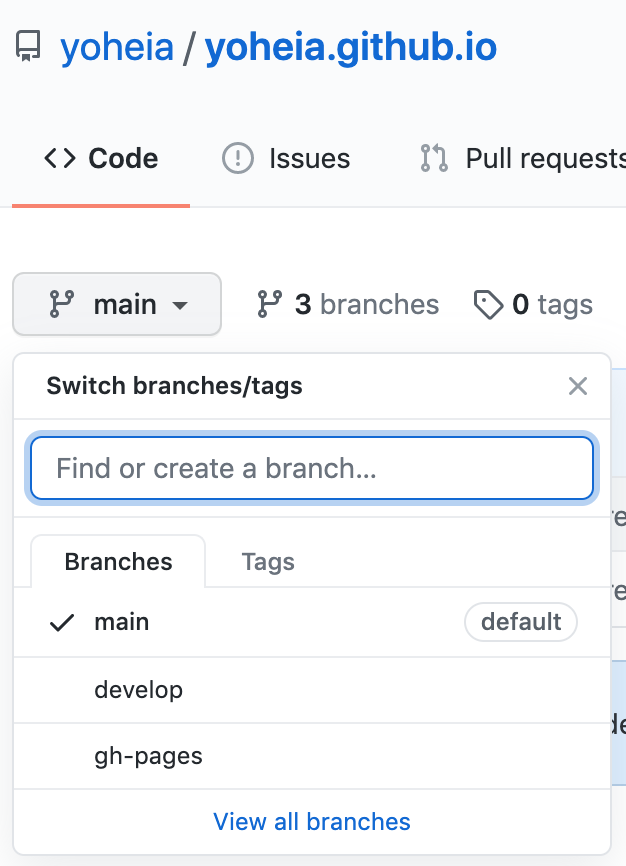
  • gh-pages, develop という名前のブランチを作成する。

$ mkdir yoheia.github.io
$ cd yoheia.github.io
$ mkdir gh-pages develop
  • ブランチを clone する
$ git clone -b develop https://github.com/yoheia/yoheia.github.io.git develop
  • develop/ 配下の .git/config を書き換える(二段階認証を有効化しているため)。
前: url = https://github.com/yoheia/yoheia.github.io.git
後: url = git@github.com:yoheia/yoheia.github.io.git
  • develop ブランチにファイルをコピーして、push する。
$ cd develop
$ git add .
$ git commit -m "add contets"
$ git push origin develop
  • public ディレクトリを作成して、gh-pages ブランチを clone する。
$ cd develop
$ mkdir public
$ git clone -b gh-pages https://github.com/yoheia/yoheia.github.io.git public
  • public/ 配下の .git/config を書き換える(二段階認証を有効化しているため)。
前: url = https://github.com/yoheia/yoheia.github.io.git
後: url = git@github.com:yoheia/yoheia.github.io.git
  • Web サイトをビルドする。
$ cd ..
$ hugo
  • ビルドしたコンテンツを gh-pages ブランチに push する。
$ cd public
$ git add .
$ git commit -m "add contets"
$ git push origin gh-pages
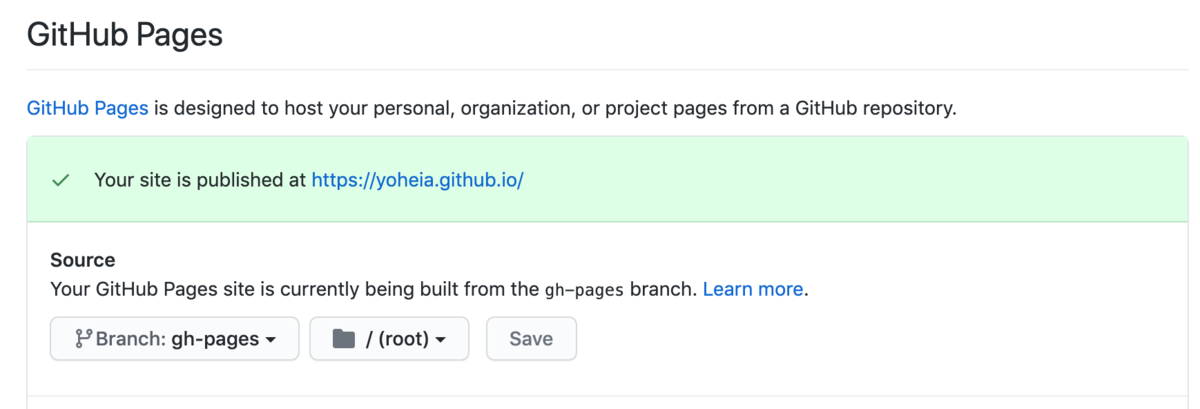
  • yoheia.github.io リポジトリの Settings で、Source で gh-pages を選択して、Save をクリック。

f:id:yohei-a:20210104173829p:plain

GitHub Pages で Jekyll を使わずに静的コンテンツを公開する

GitHub Pages は、デフォルトでは Jekyll を使ってサイトを構築します。 Jekyll 以外の静的サイトジェネレータを使いたい場合、公開元のルートに .nojekyll という空のファイルを作成し、お使いの静的サイトジェネレータの指示に従ってローカルでサイトをビルドします。

GitHub Pages について - GitHub Docs

ということなので、

$ touch .nojekyll
$ git add .nojekyll
$ git commit -m "added .nojekyll"
$ git push origin master

.nojekyll を作成して、リポジトリに push するとできた。